17 Makeup Hacks You Wish You Knew Sooner (Now You Do!)
Ever spent way too much time on your makeup, only for it to melt, crease, or just not look quite right? Or maybe you’ve seen a beauty guru pull off a flawless, airbrushed look and thought, What sorcery is this? Well, it’s not magic—it’s just knowing the right hacks.
The good news? You don’t have to spend years perfecting your routine. I’ve rounded up 17 genius makeup hacks that’ll make your life easier, your makeup last longer, and your beauty game 10x better. From skin prep secrets to pro-level blending tricks, these are the tips you’ll wish you knew sooner—but hey, better late than never!
Ready to revolutionize your routine? Let’s go!
Table of Contents
- Foundation & Base Makeup
- Contour, Blush & Highlighter
- Eyes & Brows
- Lips & Lipstick
- Quick Fixes
- Multi-Use Products That Simplify Your Routine
Foundation & Base Makeup
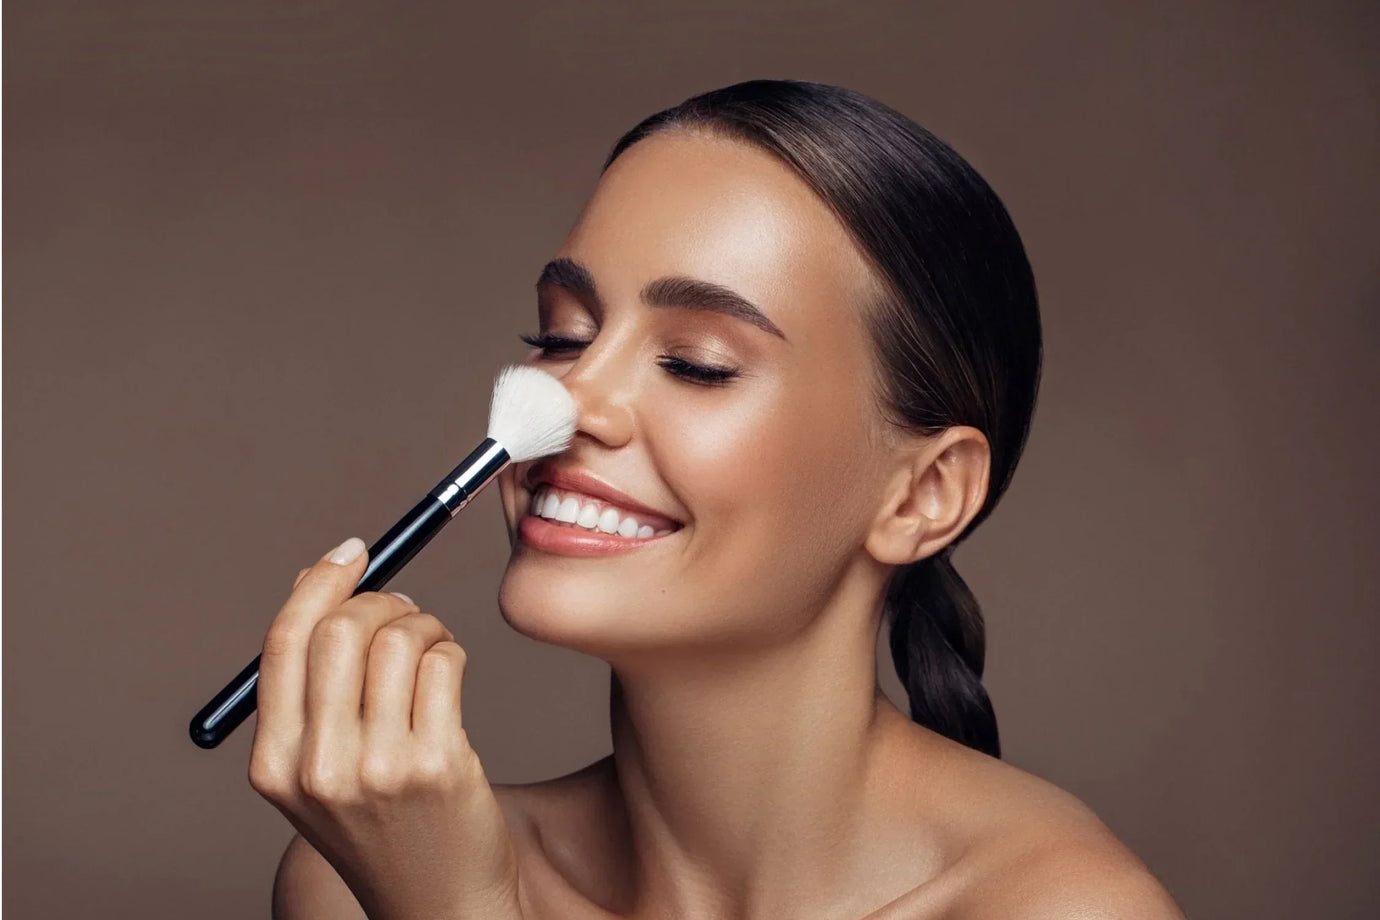
1. The Brush Prep Pro Hack for Even Foundation Application
Ever notice foundation applies patchy when you go straight from the bottle to your face? Here’s a pro makeup artist trick:
- Pump your foundation onto the back of your hand.
- Swirl your brush into the product, evenly coating the bristles.
- Dab (don’t swipe!) the brush onto your face, ensuring even distribution before blending.

This method prevents streaks and patchiness, giving you a flawless, skin-like finish.
2. The 60-Second Moisturizer Rule for a Smooth Canvas
Think of moisturizer as the primer before your actual primer. If you rush into foundation right after applying skincare, you’re setting yourself up for patchy, uneven coverage. The trick? Wait 60 seconds after applying moisturizer before moving on to makeup.
It’ll give your skin time to fully absorb hydration and will prevent your foundation from sliding around or pilling.
Pro tip: If your skin still feels tacky after a minute, gently press a tissue over your face to absorb any excess before applying foundation. This little pause makes a big difference in how seamlessly your base applies!
3. The Genius Layering Trick for Bulletproof Makeup
If your foundation melts by midday, here’s a game-changing trick: layer your products the right way. Instead of just slapping on primer and hoping for the best, try this order:
- Moisturizer – Let it sink in (60-second rule!).
- Light dusting of translucent powder – Sounds weird, but it absorbs oil
- Setting spray – Locks everything down before makeup even starts.
- Primer – Now your base is really ready.
- Foundation – Smooth, flawless, and built to last.
This little switch-up keeps your makeup fresh, crease-free, and practically invincible all day. Try it and thank me later!
4. DIY BB Cream: Mix Foundation with Moisturizer for a Natural Glow
Love a lightweight, dewy look but don’t have a BB cream on hand? Make your own! Just mix a pump of foundation with your favorite moisturizer for a custom blend that gives sheer, natural coverage while keeping your skin hydrated.
- For a glowy finish: Use a hydrating or illuminating moisturizer.
- For oily skin: Opt for a mattifying formula to control shine.
This trick is perfect for no-makeup makeup days or when you just want your skin to breathe!
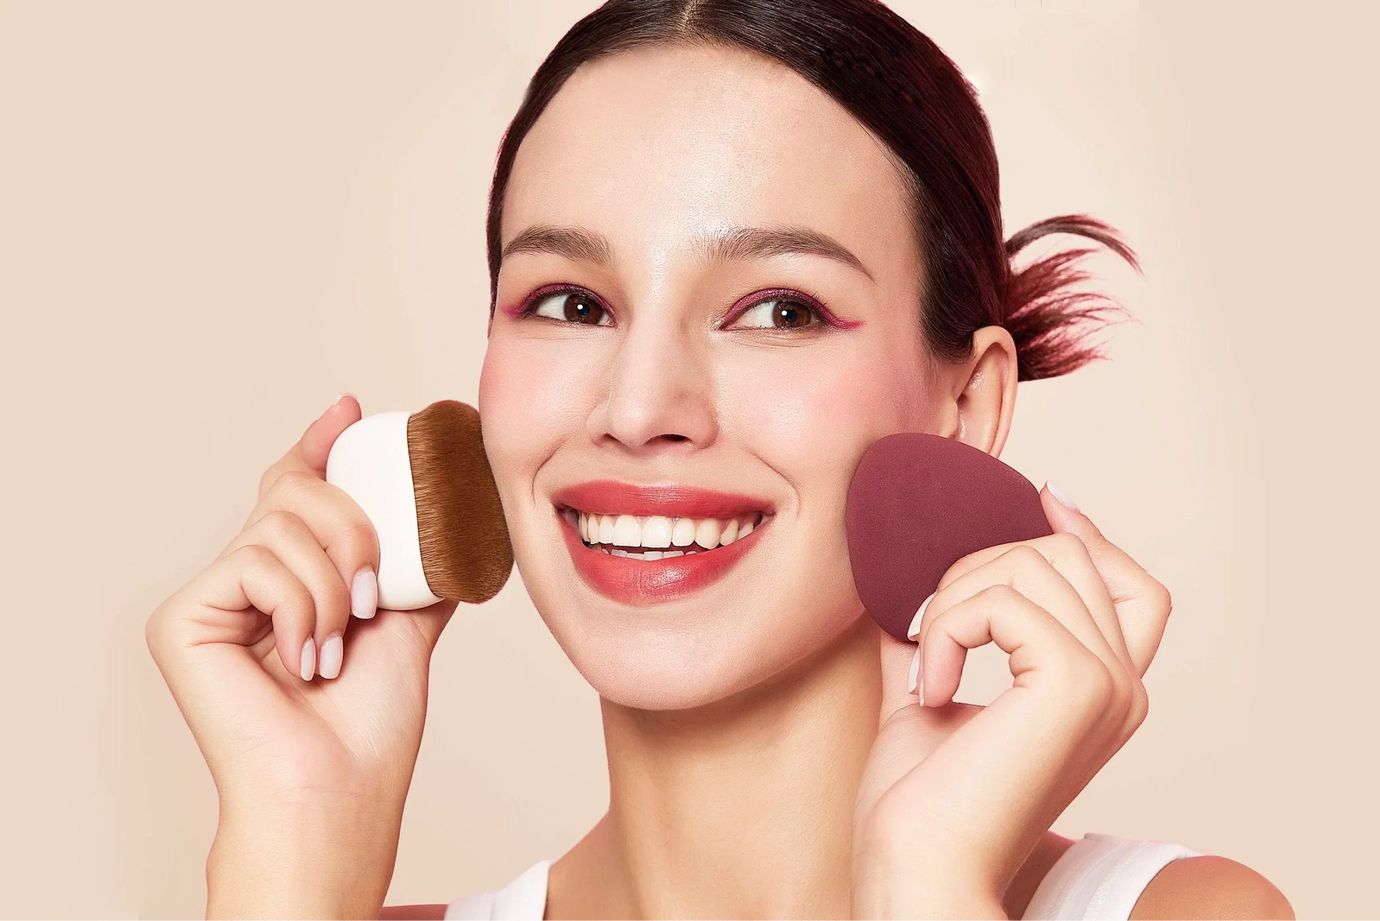
5. The Rotating Brush Hack for an Effortless Airbrushed Finish
Struggling with streaky foundation or uneven blending? The blendSMART rotating makeup brush does the work for you, giving you a flawless, airbrushed finish in seconds.
- Even product distribution – The rotating motion blends foundation seamlessly, preventing patchiness.
- Less product, better coverage – Helps you achieve full coverage with less foundation.
- No wrist fatigue – Say goodbye to endless buffing; the brush handles the blending effortlessly.

Whether you’re a beginner or a pro, this tool makes blending foolproof—just glide it over your skin and let it do its magic!
Contour, Blush & Highlighter
6. Reverse Contouring for a Naturally Sculpted Look
Traditional contouring relies on dark shades to sculpt the face, but reverse contouring does the opposite—it enhances your features using lighter concealer to create natural dimension. This technique is perfect if you want a subtle definition without harsh lines.
How to do it:
- Apply a lighter concealer under the cheekbones, along the jawline, center of the forehead, and bridge of the nose.
- Blend seamlessly—this brightens key areas, creating natural definition without heavy shading.
The result? A softly sculpted, lifted look that’s fresh, effortless, and perfect for everyday makeup!
7. Pinpoint Contouring: The Subtle Sculpting Trick You Need
Forget harsh lines and over-blended bronzer—pinpoint contouring gives you natural definition using small, precise placements of product. Here’s how to do it:
- Pick up contour with a small, dense brush (like an eyeshadow brush) using just the tip of the bristles.
- Find the sweet spot—the area between your nose and mouth, in line with the outer corner of your eye. Lightly tap just that spot until a subtle shadow forms.
- Check from the side to ensure it looks natural, then gently blend slightly up and down (but don’t over-blend!).
- Add small amounts of contour to the temples and jawline, always blending the jawline down into the neck for a seamless finish.
- For extra contrast, apply brightening powder right below the contour, under the eyes, along the cheekbones, and down the sides of the nose. Let it set, then lightly buff away excess.

The result? A sculpted, lifted face that looks effortlessly natural—no heavy-handed blending required!
8. Blush Placement Hacks for Every Face Shape
Blush isn’t just about color—it’s about where you apply it. The right placement can lift, sculpt, or soften your features instantly.

- For a lifted look:
Apply blush high on the cheekbones, blending toward the temples. This gives a snatched, face-lifting effect.
- For a youthful, fresh look:
Tap blush on the apples of the cheeks and blend outward for a soft, natural flush.
- For a sun-kissed effect:
Sweep blush across the nose bridge and high points of the cheeks for that just-back-from-vacation glow.
- For a sculpted look:
Place blush slightly under the cheekbones, blending upward. This doubles as a soft contour!
- For round faces:
Focus blush on the outer cheeks, avoiding the center to elongate the face.
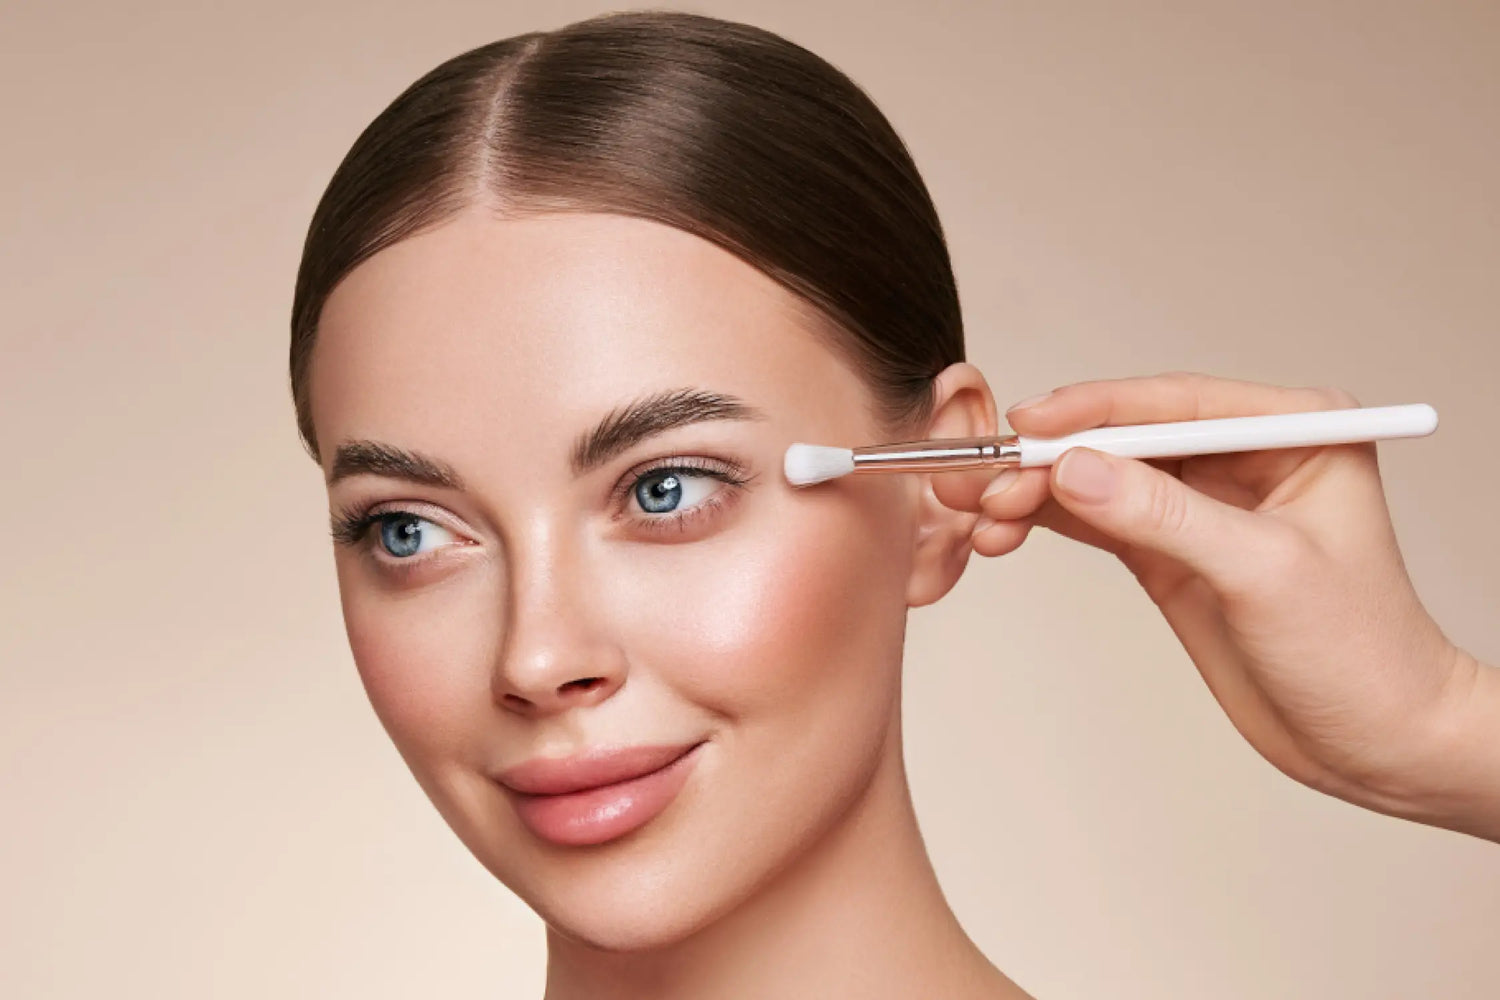
9. The Highlighter Hack for a Seamless, Natural Glow
Less is more when it comes to highlighter. Instead of dusting it all over, apply it only where light naturally hits for a glow that looks effortless, not overdone.
- Focus on the high points of the cheekbones, brow bone, and a touch on the center of the eyelid for an eye-brightening effect.
- Skip the fan brush: Use a small fluffy brush for a soft, diffused glow instead of a harsh shimmer streak.
- Lightly blend highlighter into your blush for a seamless, skin-like radiance.
This technique gives your skin a soft, radiant sheen that catches the light in all the right places—without looking heavy or metallic.
Eyes & Brows
10. The Hooded Eye Eyeliner Trick That Actually Works
Getting eyeliner right on hooded eyes can be tricky, but the secret is keeping your eyes in their natural, resting state while applying it. Here’s how:
- Sharpen a soft, blendable pencil for precision.
- With eyes relaxed, make a small dot where you want your eyeliner to end.
- Connect the dot to the outer corner where your upper and lower lash lines meet.
- Draw a second line from the dot toward the center of your upper lash line—this creates a flattering, straight shape when your eyes are open.
- Fill it in, then softly blend for a diffused look.
- Lock it in with a liquid liner, using tiny, light strokes—no heavy pressure!
Pro tip: Always apply liner with your eyes open and relaxed to ensure the shape stays visible.
Finish with mascara to lift and define your lashes for an even more open-eyed effect.
This technique keeps your eyeliner clean, lifted, and visible, no matter how hooded your eyes are!
11. The Brow Mapping Hack for Perfectly Shaped Brows
Get symmetrical, balanced brows every time with this brow mapping trick:
- Start: Align a brow pencil with the side of your nose—this is where your brow should begin.
- Arch: Angle the pencil through your pupil to find your ideal high point.
- End: Tilt the pencil to the outer corner of your eye to locate the brow tail.
- Outline & Shape: Lightly draw guide marks, connect the points, and clean up stray hairs.

Pro tip: Use concealer under the brow for a sharper, more defined look.
This method ensures perfectly structured brows that flatter your face—no guesswork needed!
12. Lash Hacks for Longer, Lifted, and Fuller Lashes
Want longer, fuller-looking lashes without falsies? Try these easy lash hacks:
- Double Curl for Extra Lift: Curl at the base first, then again mid-length for a natural, long-lasting curl.
- The Mascara Wiggle Trick: Apply mascara in zigzag motions from root to tip to add volume and separate lashes.
- Tightline for a Fuller Look: Apply a dark pencil liner to your upper waterline to make your lash line appear thicker without looking heavy.
- Separate with a Clean Wand: Use a clean spoolie after mascara to remove clumps and define each lash.
These simple tricks help your lashes look lifted, fluttery, and full—no extensions needed!
13. The Eyeshadow Tape Hack for Sharp, Lifted Looks
Struggle with uneven eyeshadow or messy fallout? Eyeshadow tape is the secret to sharp, clean lines and a lifted effect—no pro skills required!
- Place the Tape: Stick a piece of tape diagonally from the outer corner of your eye toward the tail of your brow.
- Apply Eyeshadow: Blend your shadow as usual, letting the tape act as a guide for a crisp edge.
- Peel & Reveal: Gently remove the tape to reveal a sharp, winged effect—no cleanup needed!

Bonus: This also works for perfect winged eyeliner!
Say hello to effortless, symmetrical eye makeup. Every. Single. Time.
Lips & Lipstick
14. Overline Strategically for a Naturally Fuller Look
Instead of overlining your entire lip, focus on just two key areas:
- Cupid’s bow: Slightly extend the peaks for a lifted, fuller shape.
- Center of the bottom lip: Overline subtly to add volume.
Keep the liner within your natural lip shape as you reach the corners to avoid an exaggerated look. Blend with lipstick for a seamless, plump effect.
15. The Lip Stain Hack for Effortless, Long-Lasting Color
Lip stains are the secret to natural, budge-proof color with minimal effort. Instead of applying lipstick that fades throughout the day, try this:
- Apply a thin layer of lip stain and let it set for a few seconds.
- Blot with a tissue to remove excess and lock in the color.
- Layer for intensity—add a second coat for a deeper shade without heaviness.
- Top with balm or gloss for hydration and a fresh, plumped look.
This hack keeps your lips vibrant, soft, and smudge-resistant all day!
Quick Fixes
16. Revive Cakey Makeup with Setting Spray
If your foundation looks dry, heavy, or cakey, don’t start over—fix it with setting spray.

- Mist a damp sponge with setting spray, then lightly press it into the skin to re-blend and refresh your base.
- Focus on dry areas like under the eyes or around the nose to smooth out product buildup.
- For an extra glow, mix a drop of lightweight facial oil with setting spray before pressing it in.
This trick melts everything together, giving your makeup a fresh, skin-like finish—no reapplication needed!
17. The No-Mess Fix for Mascara Smudges
Smudged mascara? Don’t wipe it off right away! Let it dry completely first—trying to remove wet mascara will only make it worse.
- Once dry, gently flick it off with a clean spoolie or cotton swab—no smearing, no mess.
- For stubborn smudges, dip the swab in micellar water or concealer to clean up without ruining your makeup.
- Prevent future smudging by setting your under-eyes with translucent powder before applying mascara.
This hack saves your eye makeup and keeps everything looking flawless!
Multi-Use Products That Simplify Your Routine
Makeup should be easy, not overwhelming. That’s why I can’t recommend multi-use products enough—they cut down on clutter and save money without sacrificing results. Whether you’re streamlining your routine, traveling light, or just love a minimal approach, these clever swaps will keep your makeup bag light and your look flawless.
Lip & Cheek Tint in One – A liquid or creamy blush doubles as a natural lip stain for a cohesive, effortless look.
Bronzer as Eyeshadow – Sweep bronzer into the crease of your eyelids for a quick, warm-toned eyeshadow that ties your whole face together.
Setting Powder as Dry Shampoo – Translucent powder absorbs oil in your hair just like dry shampoo—just use a fluffy brush to dust it onto your roots.
Petroleum Jelly as Highlighter, Brow Gel & Gloss – A dab on cheekbones adds dewiness, smooths brows, and gives lips a glossy finish.
Cream Highlighter as Lip Enhancer – Tap a bit of highlighter onto the center of your lips to make them look fuller.
Tinted Moisturizer as Foundation – A lightweight alternative to foundation that evens skin tone while keeping it fresh and breathable.
Eyeliner as Lip Liner – A brown eyeliner can double as a warm, nude lip liner in a pinch.
Multi-use products save time, space, and money while making your routine way more versatile!
Conclusion
Mastering makeup isn’t about spending more time—it’s about knowing the right tricks. With these 18 game-changing hacks, your routine will be faster, smoother, and more flawless than ever. Whether it’s a quick fix for cakey foundation, a contouring trick that sculpts effortlessly, or a multitasking product that streamlines your kit, these tips make every step easier.
Now that you know the secrets, it’s time to put them to the test! Which hack will you try first?
![Best Foundations for Dry Skin [10 Top Picks + Pro Tips]](http://blendsmart.co.uk/cdn/shop/articles/Untitled_design_2.jpg?v=1754050507&width=1380)